Tutorials
Get started with OP3
Automatic Distribution Off
MaxFit and AWP are automatic algorithms, which re-calculate the entire Board on every change made on the Table. What if you were working on the board for some time, applied some nice colors, changed positions and text visibility for some tasks and milestones, and then you would like to make some minor changes on the Table, while keeping the current state of the board intact.
Don’t worry, we thought of that 😄
If you don’t like the automatic behavior, you can always turn it off, and when it’s off, you can perform the same actions on the Table as you usually would. However, in order for the current board state to remain intact, there are several rules you need to be aware of when performing different actions on the table.
Task Group Workflow
Every time a new task group is created, it has a default height. If the current last task group has enough space in the bottom to support the new task group, then it will be added and set to visible. Otherwise, the new task group will be added on the Table, but it will be set to invisible since there is no space enough for it to fit.
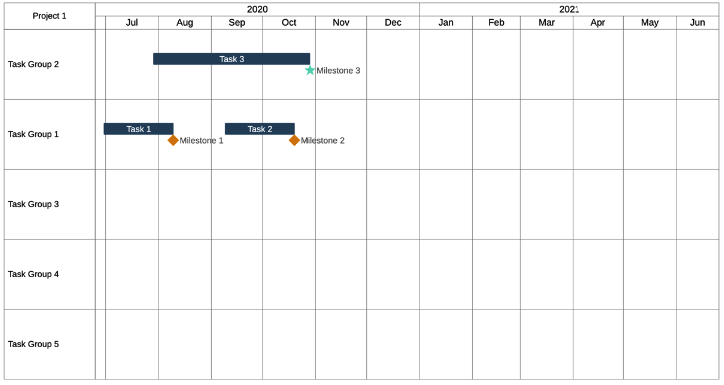
Adding a new task group in the following project would result to the new task group being added at the bottom and set to visible.
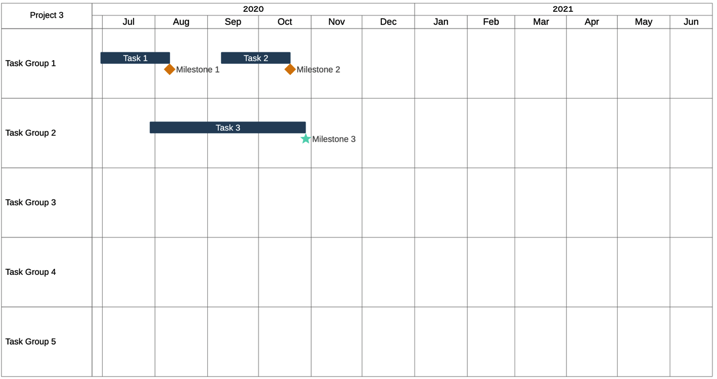
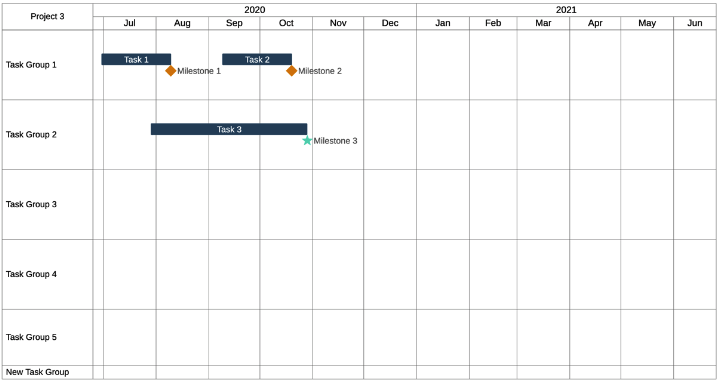
You can see that the new task group is added at the bottom, but the other parts of the board remained unchanged.
If you want to add another task group, it won’t be added, since ‘New Task Group’ doesn’t have enough space at the bottom to support the new task group. The only way to add a new task group in this case is to go to the Board View, scale up ‘New Tas Group’ to make some free space at the bottom.
By looking at the current state, you can turn off one of the visible task groups, ex. Task Group 2. This would result in the board shown below:
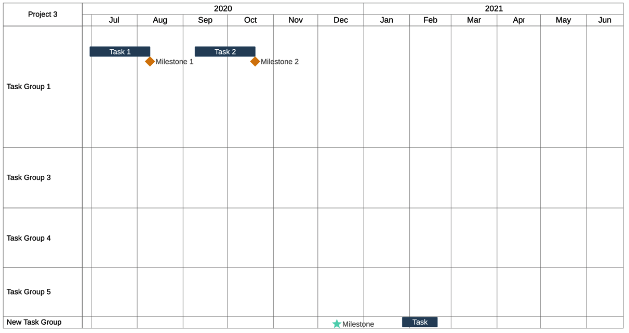
Note that even though ‘Task Group 2’ is hidden, it still keeps the original height in the background. In the meantime, you can switch to Board View, scale up ’Task Group 1’, and then decide to turn ‘Task Group 2’ on. It will be only shown if ‘Task Group 1’ has enough space at the bottom to support ‘Task Group 2’ in its original height.
Task and Milestone workflow
Given the current state of the board, you can easily insert a Task or Milestone. The placement of the item inside the respective Task Group is performed using the following checks:
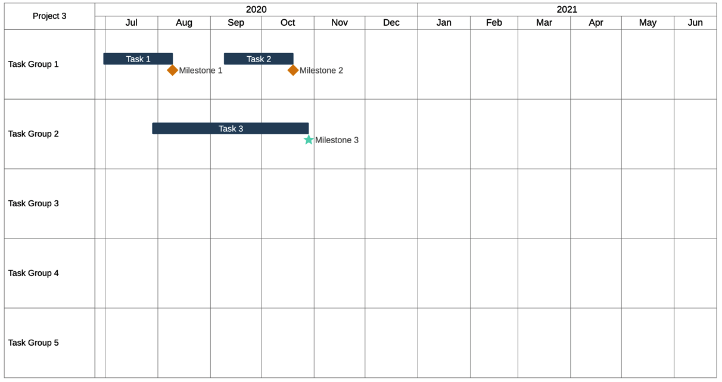
- - If task/milestone already has height and vertical position, try to place at the same coordinates.
-
- o If it’s task, place it only if it doesn’t collide with nearby tasks
- o If it collides with any task, try to place it using Top to Bottom strategy, starting from the top of the task group, and going to the bottom until free space is found.
- - If task/milestone doesn’t have a vertical position, use the Top to Bottom placement strategy.
If a task is added in the first task group, it would lead to the following board representation – Top to Bottom placement strategy is used, since the new item doesn’t have an initial vertical position.
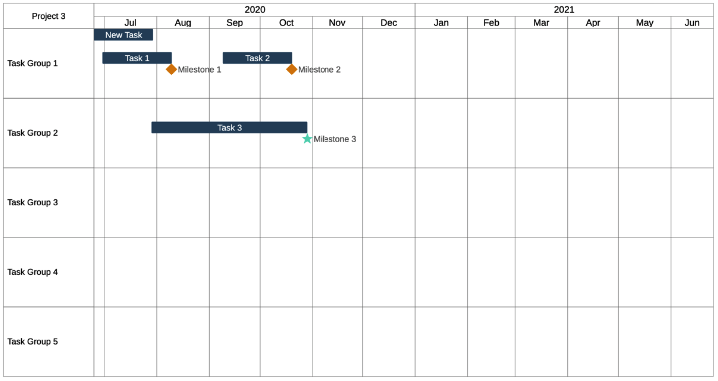
Now let’s look at a more complex example:
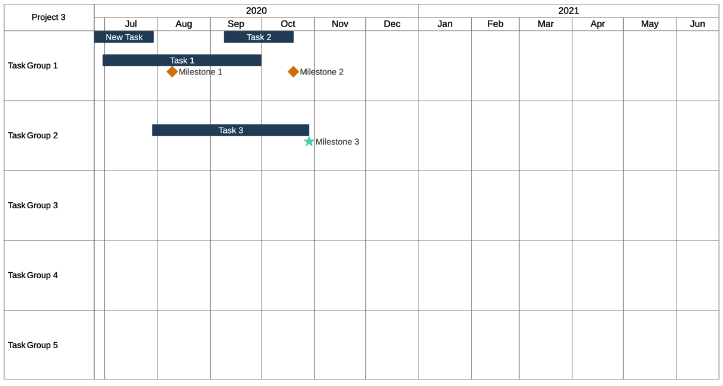
- 1. While on Table View, turn off `Task 2`
- 2. Go to Board View, set end date of `Task 1` to September 30, 2020.
- 3. Go to Table View, turn on ‘Task 2’
- 4. Since ‘Task 2’ has a vertical position, collision with nearby tasks is checked first. It’s clear that it will collide with newly resized ‘Task 1’ if it’s placed in the same place.
- 5. ‘Task 2’ will be placed using Top to Bottom strategy, as shown in the board state bellow.
Move Task Group
Don’t like the default ordering of the Task Groups? No problem, with a single drag and drop you can re-position a task group anywhere. For the given board state, you can swap the order of ‘Task Group 1’ with ‘Task Group 2’, as shown below.
